 |
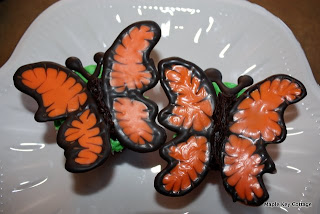
| Chocolate Butterflies on top of green frosted chocolate cupcakes |
 |
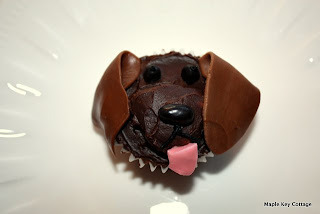
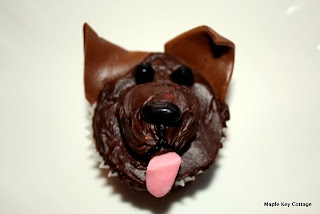
| Cute little puppy! |
I used jelly beans for the eyes and noses. Smaller ones for the eyes, since the large ones were TOO big and looked kind of scary!
The tongues were tricky, since I didn't have the right candy. I ended up cutting apart some of those gummy teeth (found at the Bulk Food store). I used a knife to cut off the white "tooth" portion, then rolled out the pink "gums". It took a bit of manipulation to get the shape right, but like how they turned out.
The ears were another component that took some time to do. I used mini tootsie rolls, unwrapped and microwaved them (2 at a time, so they wouldn't cool before I had time to shape them) for about 10 seconds to soften. I then rolled them out so they would be flat, then used a paring knife to cut away and help shape them into ears.
Muzzles are just 1/2 of a large marshmallow with frosting on top.
For the butterflies, I first found a photo of a butterfly online that had a good silhouette, printed it off and traced the outline onto a few small pieces of paper. I then put a piece of paper under some wax paper, and used melted chocolate to trace the outline.
After I traced 4 or so, I switched colours and flooded the inside of the wings with melted orange chocolate. I only did a few at a time, because I wanted to be able to work with the dark chocolate before it set. After flooding, I used a toothpick to make lines from the dark into the orange.
Once all that was done, the whole lot got put into the freezer to set while I worked on creating the antenna out of more chocolate. They got put in the freezer for a few minutes as well.
Once all the chocolate was set, it was time to assemble. So exciting, I just couldn't wait to see if they would turn out or not, and if the wings would melt. I put both wings pretty close together on top of a cupcake, then filled in the small gap I left with more chocolate. Added the antenna, and they were done!
To keep the wings from toppling over, I pipped a bit of extra frosting underneath to help stabilize.

No comments:
Post a Comment